Fixing Dent or Crease in Kayak Hull
Dents or creases in the hull of your Kayak from rough terrain or improper storage are definitely not something a paddler is happy to see. However worry not, because there are quite a few methods fellow boaters have found that can remove the damage and have you back on the water in no time. Below are several popular repair methods as well as some tips for preventing future damage. The tips below are in order of severity of the damage – try the first methods (easier and safer) and move on to the more difficult methods if they do not work.
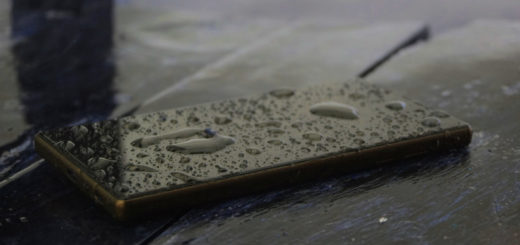
Does your kayak have a dent or crease similar to this poor boat here?
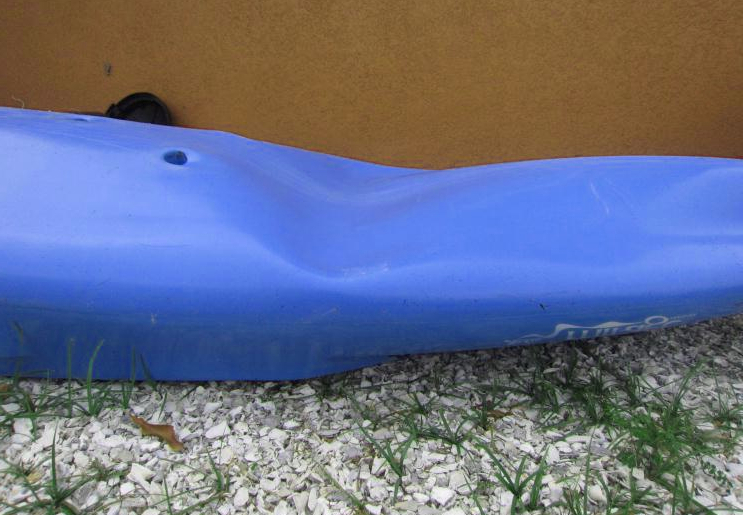
The hulls of most Kayaks are made of polyethylene, a plastic that is popular for use in boating as well as a multitude of other products due to its flexibility and affordable manufacturing. The dents these methods are meant to fix are large dents where the plastic is bent back concave from it’s normal direction. Typically these type of dents or creases occur from improper storage, although they can also occur from impact with rocky terrain. Very small cosmetic dents will not benefit as much from these tips, but fortunately this type of damage will not have an effect on performance in the way a larger crease can.
Sun Method
This method is popular because it requires no supplies, minimal effort, and has the least risk of further damage to the kayak. Simply lay the kayak out in direct sunlight with the hull facing upwards without any pressure on it. A soft spot such as a grass lawn is ideal, but a harder surface such as a driveway can work with some towels laid out to protect the plastic from scratches or over heating and melting from contact with the hot pavement. The sun’s rays will gently warm the plastic, hopefully causing the hull to temporarily soften just enough for the dent to “pop” back out. If this method works, some recommend pouring some cool water over the hull after it has popped out to shock the plastic helping retain the correct shape.
Apply Heat
For dents that can’t be removed using the sun method, it may be necessary to apply heat to soften the plastic and allow the hull to snap back into shape. There are numerous way to apply heat using house hold items, however they all require some caution to avoid both melting the hull and getting burned. It is best to start with lower amounts of heat increasing until the dent “pops”:
- A normal hairdryer can provide controllable heat to the dented area.
- A heat gun from your local hardware store or toolbox can provide much more heat than a hairdryer but with increased risk of melting the hull. Be especially careful to continually move the heat gun along the damaged area to make sure not to overheat and melt any one area.
- Boiling water can provide a large amount of heat. Water is less likely to melt the hull but increases risk of getting burned because it is harder to control than a hairdryer or heat gun. A kettle of some sort is best because it will allow for easy pouring and control of the water onto the damaged area, however a regular cooking pot will work as well. Slowly pour the heated water over the damaged area and surrounding plastic. It may take several rounds of water before the dent fully pushes out. If it does not budge, pressure may need to be applied in addition to the heat to force the softened plastic back into the desired hull shape.
With any of these applied heating methods, have cool water nearby to cool the heated area if the dent pops out. Rapidly cooling the area will help the plastic retain its shape and prevent accidentally creating additional damage to the softened area. This also helps ensure the damage is completely repaired – if it pops back out of shape after cooling you will know that additional work is needed to make the repair permanent.
Apply Heat and Force
For severe damage, all of the previous methods may not be enough. In this case it is worth trying to use some force in addition to softening the plastic with heat. This should be done as a last resort since the heat alone methods are better for the hull. An easy way to apply some pressure is using your hands to try to push the dent out once heated (use gloves to prevent burns from heated areas). Many creases at the center bottom of the hull come from storing the kayak unsupported on a flat surface – this type of damage might benefit from supporting the boat by it’s handles and adding some weight (large rocks, cinder block, etc) inside the kayak to push outward on the damaged area while applying heat. This will require some creative rigging. Besides pushing the dent from the inside, some have had success with using suction devices to pull on the dent from the outside. This is especially helpful for sit-on-top type kayaks where it may not be possible to push from the inside of the kayak. Suction cup dent removers designed for cars are one option, as are shower handles with dual suction cups, or even glass carrying suction cups which look similar to the shower handles but are often much stronger.
Preventing Future Damage
The most common source of hull dents or creases is improper storage. Typically terrain is more likely to cause scratches unless the run-in is severe. The best way to avoid future damage is proper storage for the kayak. This typically means hanging the kayak vertical or suspended from a basement or garage ceiling in such a way that no pressure from the weight of the kayak is pushing on the hull. There are many good guides with detailed kayak storage ideas. Please let us know in the comments if you have any additional repair tips, and let us know how these ideas worked for you. Happy paddling!